changing air filter E53 30d
Posted: Mon Aug 23, 2010 9:46 pm
CHANGING THE AIR FILTER ON A E53 3.0D
Changing the air filter on a 3.0d should be a 5 min job as it is on the petrol X5’s. However it’s not. I did mine today and taking my time it took me the best part of an hour from start to finish. Along the way I took a few photo’s that you may find helpful should you wish to take on the job yourself.
1.) Tools needed as follows – 13mm spanner. 13mm socket with wrench. 5mm Allen Key.
2.)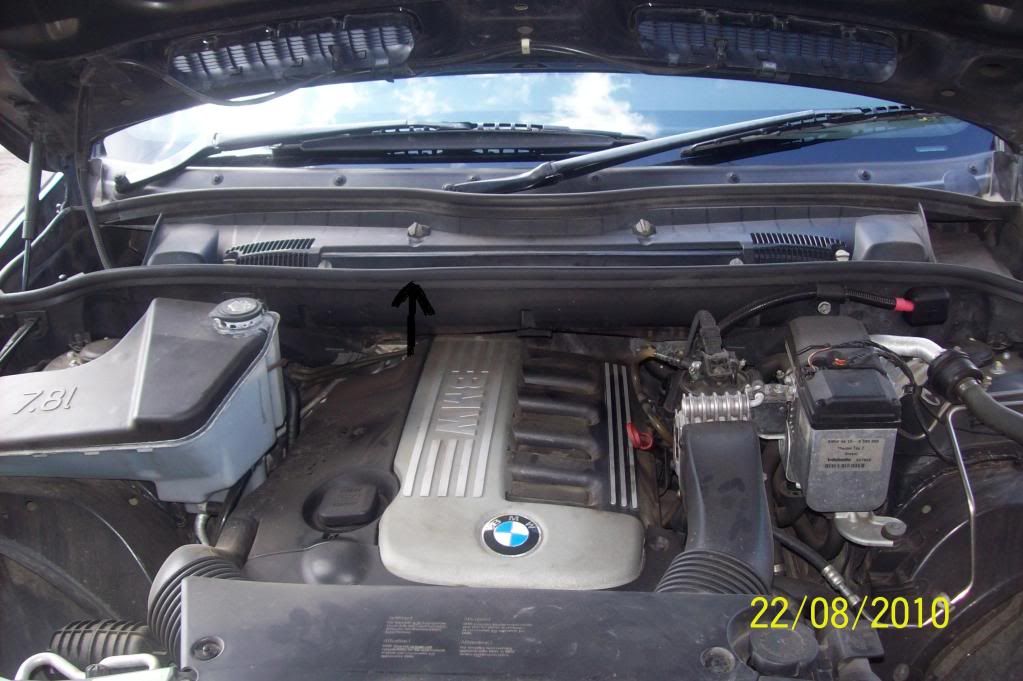
Remove the rubber trim that runs along the top of the bulkhead.
3.)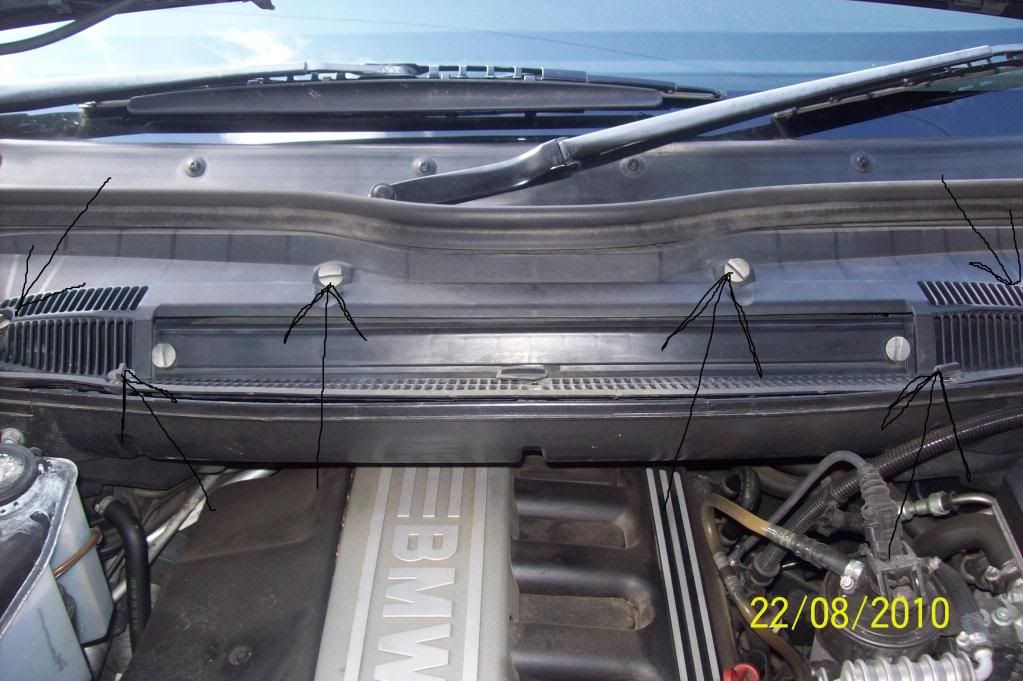
Undo the quick release screws around the pollen filter but not the two that take the actual filter out. You will then be able to remove the plastic scuttle.
4.)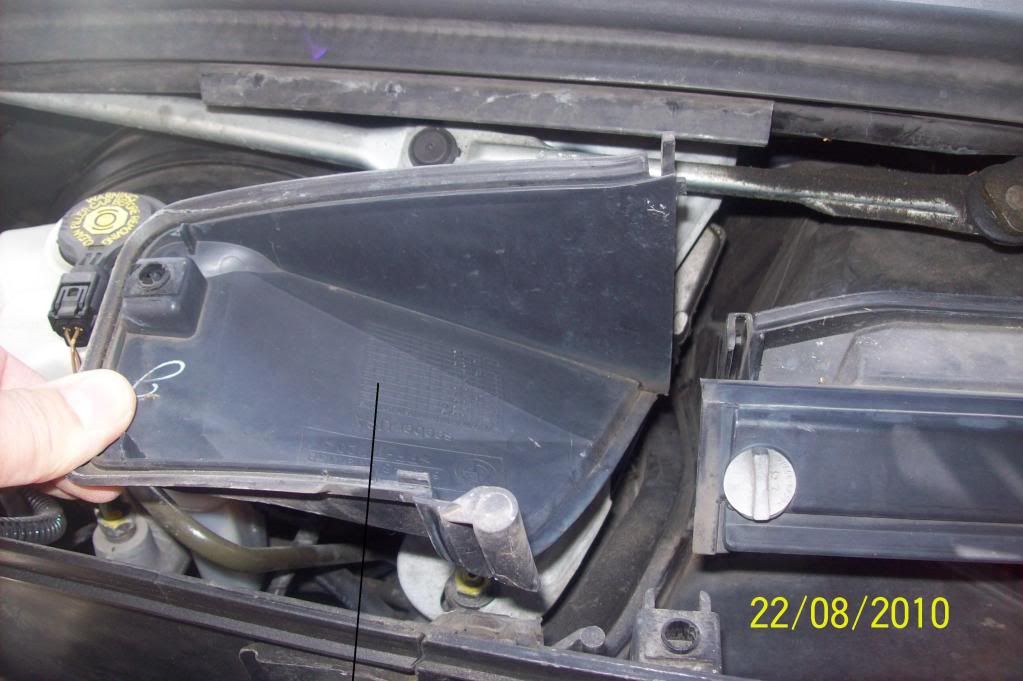
Once you have removed the scuttle you will see to the left and right of the pollen filter a plastic scoop type thing. These need to be removed and this is done by just lifting them out.
5.)
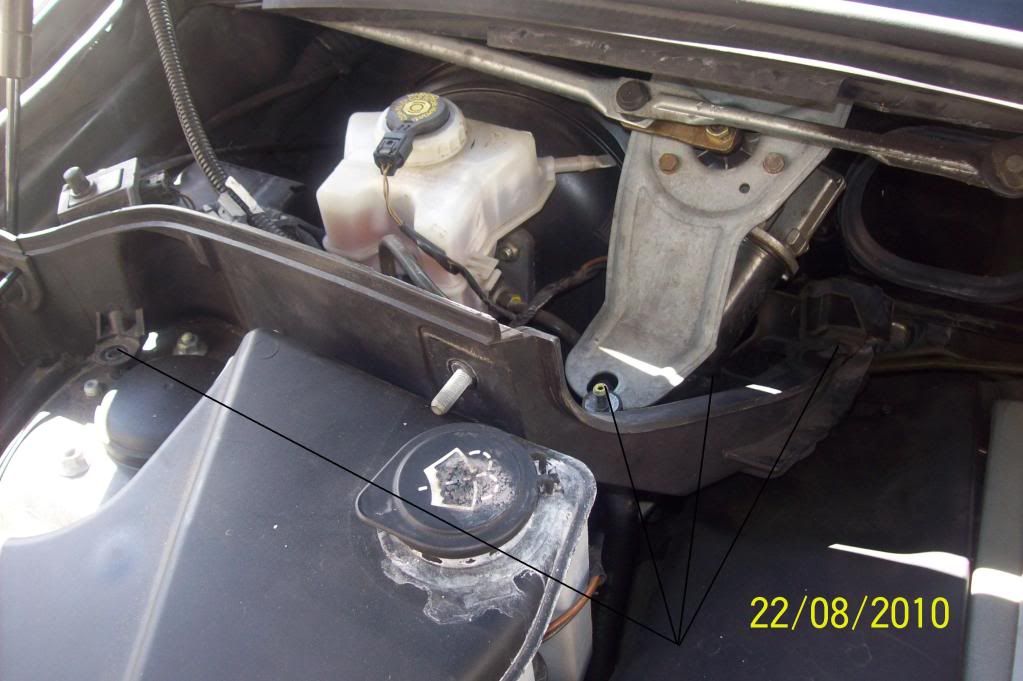
Undo the two 13mm nuts using the 13mm spanner/socket.
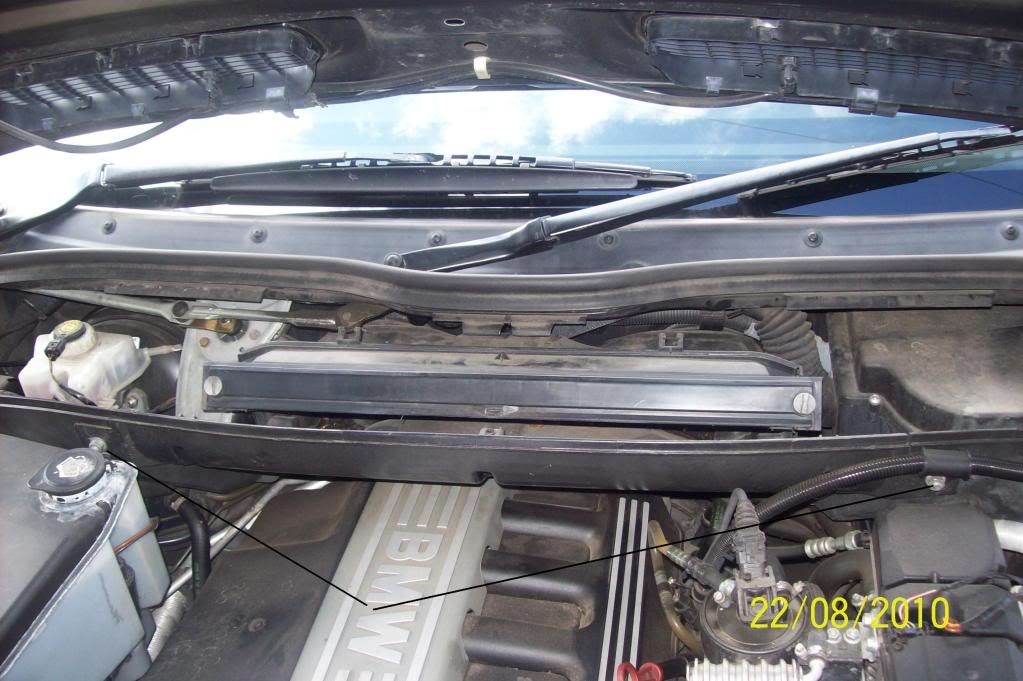
6.)
With the two nuts removed you can slide out the pollen filter assembley. Be careful its heavy. The picture above shows the assembley removed,note you can now see the back of the engine.
7.)
To gain complete access to all of the bolts on the air filter housing you need to move out of the way one more piece of plastic. This is done by undoing the 13mm nut on the bottom of the wiper motor. Then the two 10mm bolts below that,then finally the plastic 10mm nut
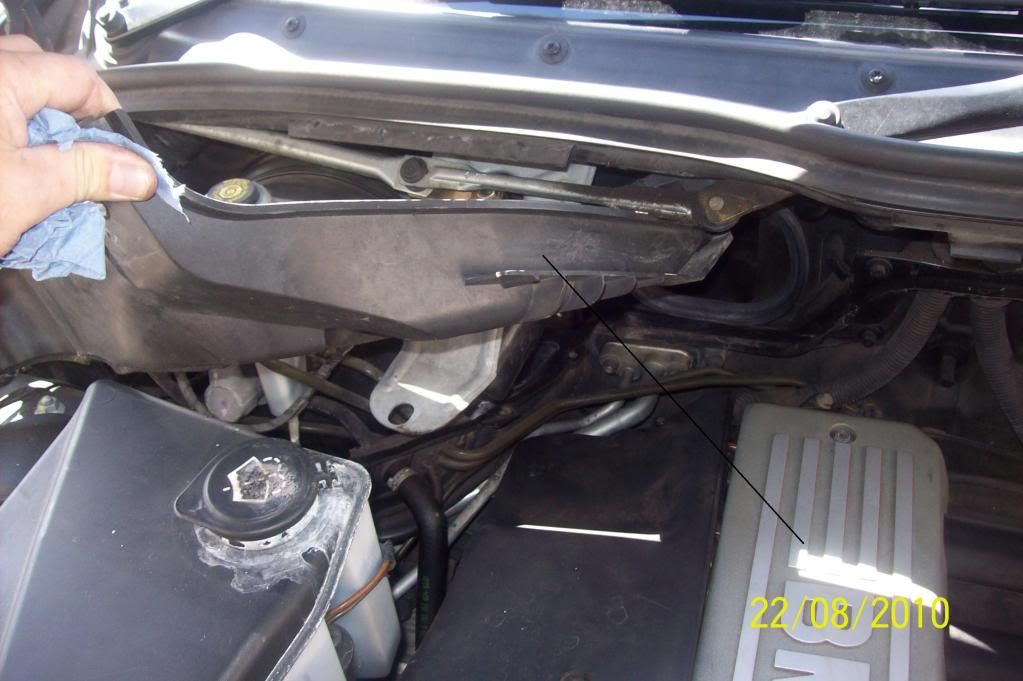
The last picture shows the plastic trim moved out of the way,there is no need to remove it completly just prop it out of the way so that you can gain access to the air filter bolts at the back. Yes you got it all the work done so far is to get to the back two bolts on the filter housing.
8.)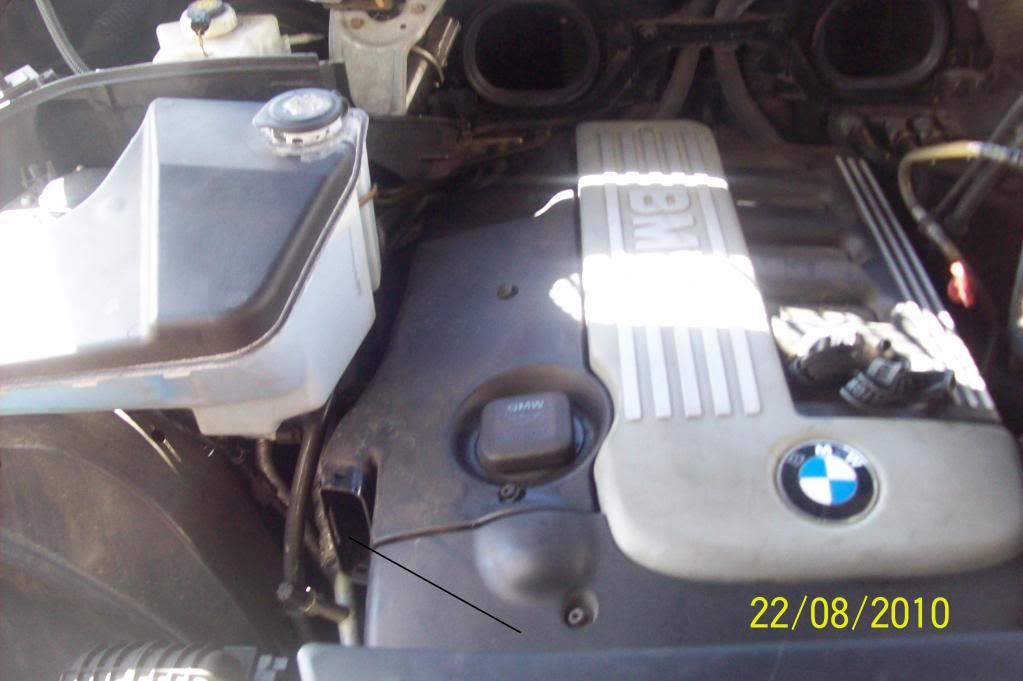
Remove the plastic airfilter intake pipe. (photo taken before I started)
9.)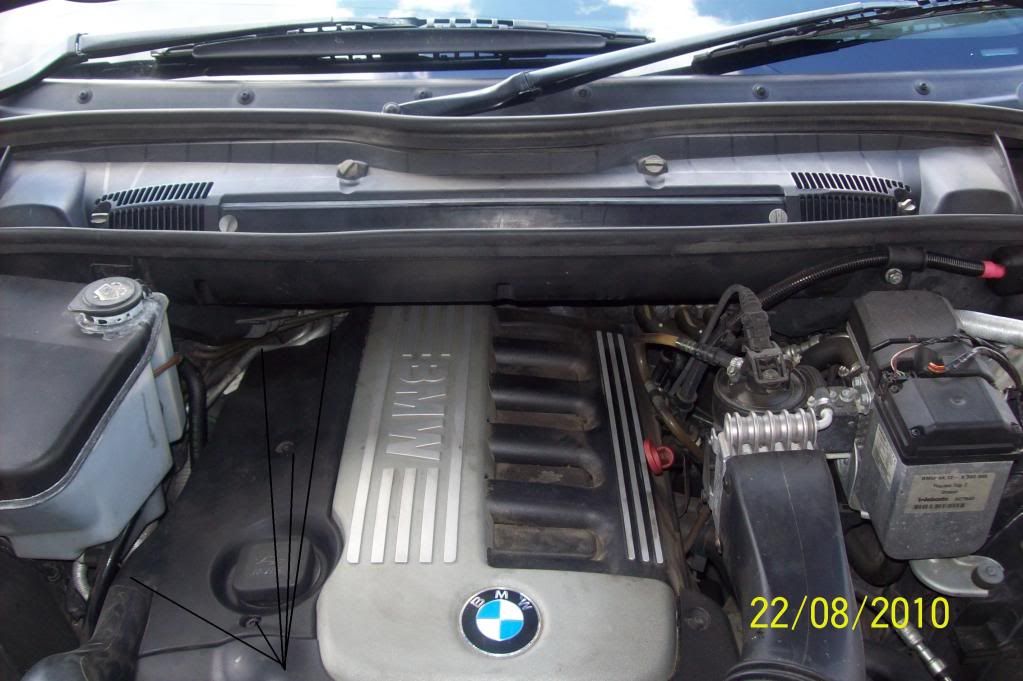
Again photo taken before i started but you then need to undo the five air filter housing bolts with a 5mm allen key. These bolts are captive so will not come all of the way out. The reason for removing the pollen filter assembley is to gain access to the two rear bolts. Once the bolts have been undone remove the oil filler cap. This will then allow you to remove the air filter housing.( tip – replace the oil filler cap as soon as you’ve the housing clear of the engine).
10.)
Housing removed ( filler cap back on) You can see the air filter lying north/south. To remove the filter just push it towards the bulkhead and lift out. When the filter has been rmoved you may need to hoover around the bottom half of the housing to remove a ny insects/bits.
11.)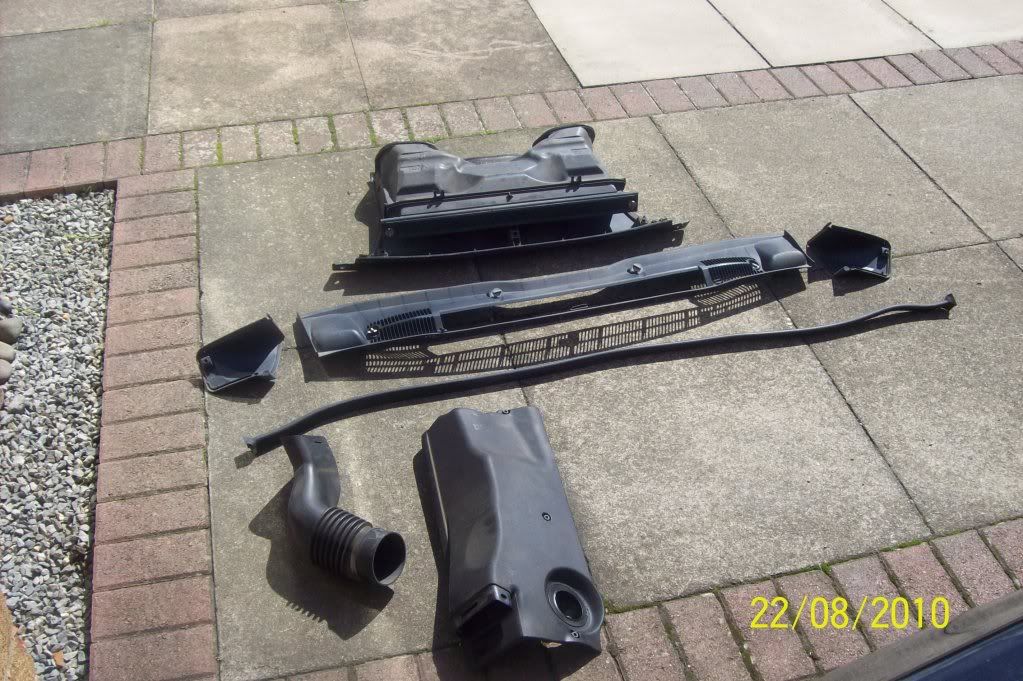
The bits removed.
Obviously replace in reverse order.
Good luck......
The dweeb
Changing the air filter on a 3.0d should be a 5 min job as it is on the petrol X5’s. However it’s not. I did mine today and taking my time it took me the best part of an hour from start to finish. Along the way I took a few photo’s that you may find helpful should you wish to take on the job yourself.
1.) Tools needed as follows – 13mm spanner. 13mm socket with wrench. 5mm Allen Key.
2.)
Remove the rubber trim that runs along the top of the bulkhead.
3.)
Undo the quick release screws around the pollen filter but not the two that take the actual filter out. You will then be able to remove the plastic scuttle.
4.)
Once you have removed the scuttle you will see to the left and right of the pollen filter a plastic scoop type thing. These need to be removed and this is done by just lifting them out.
5.)
Undo the two 13mm nuts using the 13mm spanner/socket.
6.)
With the two nuts removed you can slide out the pollen filter assembley. Be careful its heavy. The picture above shows the assembley removed,note you can now see the back of the engine.
7.)
To gain complete access to all of the bolts on the air filter housing you need to move out of the way one more piece of plastic. This is done by undoing the 13mm nut on the bottom of the wiper motor. Then the two 10mm bolts below that,then finally the plastic 10mm nut
The last picture shows the plastic trim moved out of the way,there is no need to remove it completly just prop it out of the way so that you can gain access to the air filter bolts at the back. Yes you got it all the work done so far is to get to the back two bolts on the filter housing.
8.)
Remove the plastic airfilter intake pipe. (photo taken before I started)
9.)
Again photo taken before i started but you then need to undo the five air filter housing bolts with a 5mm allen key. These bolts are captive so will not come all of the way out. The reason for removing the pollen filter assembley is to gain access to the two rear bolts. Once the bolts have been undone remove the oil filler cap. This will then allow you to remove the air filter housing.( tip – replace the oil filler cap as soon as you’ve the housing clear of the engine).
10.)
Housing removed ( filler cap back on) You can see the air filter lying north/south. To remove the filter just push it towards the bulkhead and lift out. When the filter has been rmoved you may need to hoover around the bottom half of the housing to remove a ny insects/bits.
11.)
The bits removed.
Obviously replace in reverse order.
Good luck......
The dweeb