Page 2 of 3
Re: My new X5 and progress so far with work (pic heavy)
Posted: Sun May 05, 2013 11:04 am
by Jamee
Very very nice, you have made it look spot on again. Loving the shiny lights, I need to do this but have to learn how to do it 1st, any write ups and what materials do I need?
Any chance I can send my dash to you to fix?
Re: My new X5 and progress so far with work (pic heavy)
Posted: Sun May 05, 2013 2:17 pm
by dpbayly
[quote="Jamee"]
Very very nice, you have made it look spot on again. Loving the shiny lights, I need to do this but have to learn how to do it 1st, any write ups and what materials do I need?
Any chance I can send my dash to you to fix?
[/quote]
The dreaded Headlight fogging......
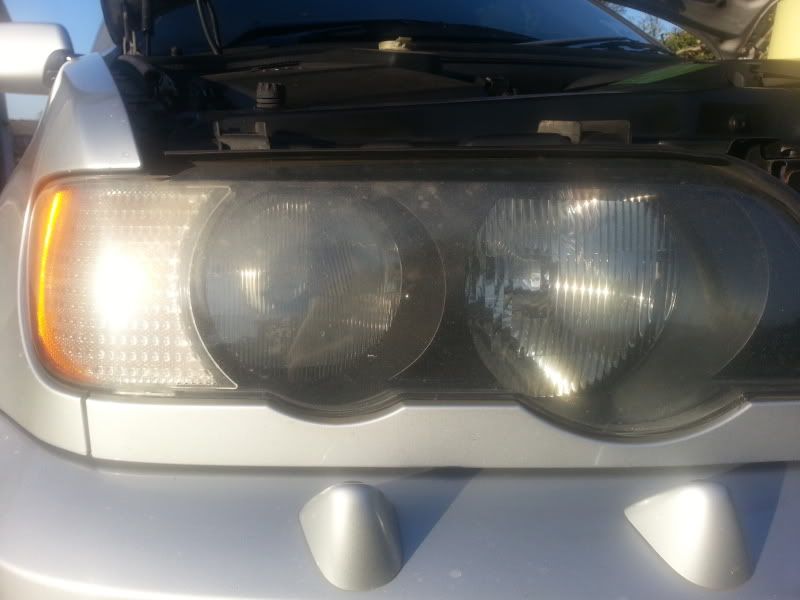
Working on the lights is a simple job you'll need to pop to halfords and pick up some wet and dry sand paper 400 grit, 800 grit 1200 or 1500 grit and if you haven't got a machine polisher get some 2000 grit as well also roll of 2" masking tape and a tube of G3 compound, then you will need to take a small bowl and fill it with soapy water then your ready to go
Start by removing the lower light trim and mask up the wing around the light so to not catch it with the sand paper.
Then take the coarse 400 grit (all sanding is done wet using the soapy water)and go to town on the lights keep a rag to hand and keep wiping it dry your looking for a smooth even finish like this pic:
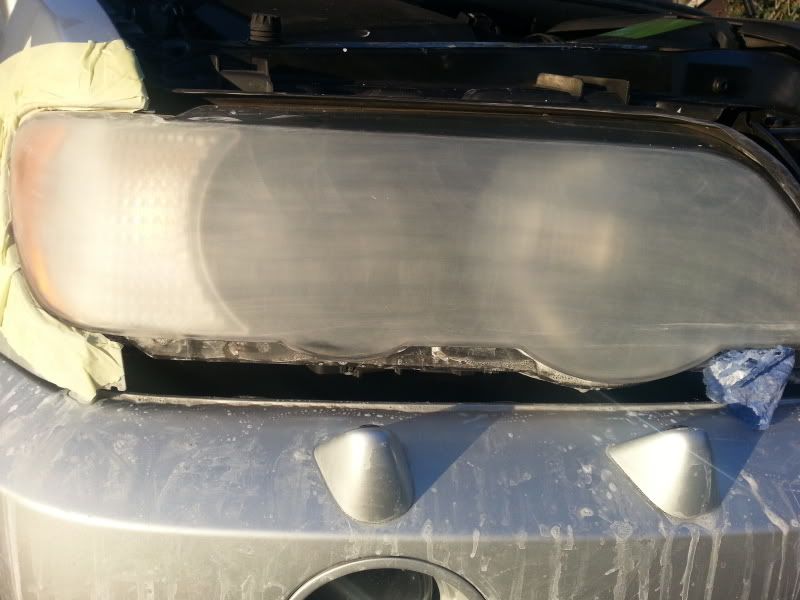
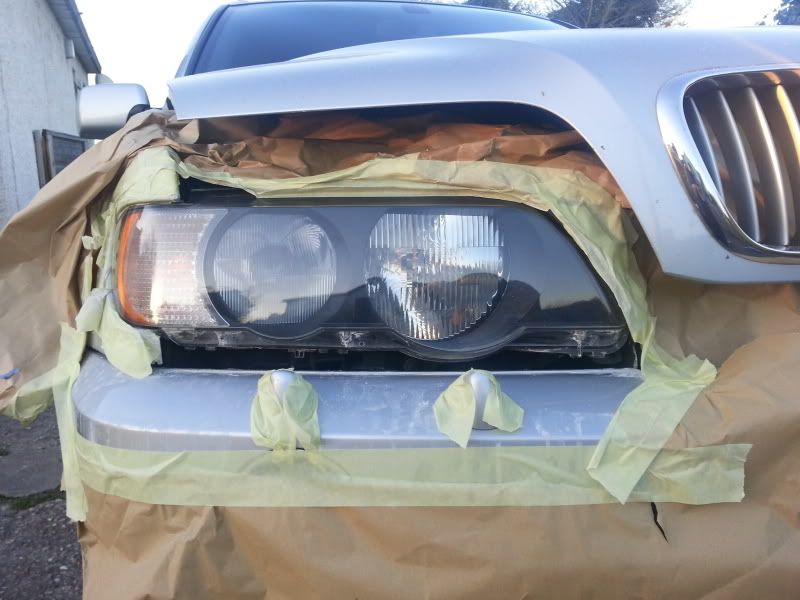
Then work your way up through the grades of paper it will become less and less cloudy the higher the grit, once your finished with the 2000 grit dry the lights and take a cloth and buff them back up to a shine with the G3 compound it will take a bit of elbow grease but you will get the same finish as I achieved with the machine polisher, brand new looking......
Re: My new X5 and progress so far with work (pic heavy)
Posted: Sun May 05, 2013 2:43 pm
by dpbayly
[quote="Jamee"]
Any chance I can send my dash to you to fix?
[/quote]
It really isn't that hard to do just take your time it's straight forward I can now turn one round in half an hour but the first one took twice that.
Ive had this link saved on my computer for years and I've always used it to refer to when repairing the dash fault on my 2 E38's and and 2 E39's as well as friends X5.
Link
http://www.bimmerboard.com/forums/posts/543597
Re: My new X5 and progress so far with work (pic heavy)
Posted: Sun May 05, 2013 10:11 pm
by Raj
Superb effort and work. Nicely turned around.
Re: My new X5 and progress so far with work (pic heavy)
Posted: Mon May 06, 2013 6:56 pm
by Jamee
Thanks for write up mate, will give it a bash on the weekend. I would attempt the dash, just not confident enough, it will have to be sent off to Rudi on the 20th when I'm away, unless u want to earn £50. Lol.
Re: My new X5 and progress so far with work (pic heavy)
Posted: Tue May 07, 2013 12:48 am
by Rusty
Great job on the X. Looks as good as new.
If you're not careful you will have a line of X's outside your's
There's a thought, next meet anyone?
Sent from my iPad using Tapatalk
Re: My new X5 and progress so far with work (pic heavy)
Posted: Tue May 07, 2013 6:34 am
by shadrack
I'd love abit more info\ write up on how you did the scratches, I've a machine polisher and g3 etc but darnt start sanding my car lol, but with the m3 and the coupe been black both have a few minor scratches etc, also need to de swirl them but need a basic lesson lol, love the transformation and as above you may find your saturdays gone in the future with plenty of beer money for you!
Re: My new X5 and progress so far with work (pic heavy)
Posted: Tue May 07, 2013 7:05 am
by PeterL
It's not often I am impressed by other people and their work, but you definitely did a fantastic job. Would the compound you used on the headlights work on some scratches I have on the front side windows on my M5 as it has some scratches I would rather try to remove than replace the glass itself?
Re: My new X5 and progress so far with work (pic heavy)
Posted: Tue May 07, 2013 6:26 pm
by dpbayly
Thanks guy's
[quote="shadrack"]
I'd love abit more info\ write up on how you did the scratches, I've a machine polisher and g3 etc but darnt start sanding my car lol, but with the m3 and the coupe been black both have a few minor scratches etc, also need to de swirl them but need a basic lesson lol, love the transformation and as above you may find your saturdays gone in the future with plenty of beer money for you!
[/quote]
The removal of light scratched is simple but you do need to be careful not to wet flat too much to go through the lacquer the rule i use is if you can feel the scratch with your nail is too deep and needs another approach, with light scratches take 1500 grit wet with soapy water and lightly rub the scratch till it can no longer be seen then using compound and the machine polisher to work the area back to a shine.
Heavier scratches that you can feel with your finger nail but haven't scratched through the base coat (colour) I've successfully repaired these by using Halfords clear lacquer in a touch up start by cleaning the scratch out really well as it normally collect dirt and wax then take the touch up and run it down the scratch then give it 24hrs to dry and then take masking tape and run it approx 1mm either side of the edge of the lacquer as it will be sitting proud of the surface of the paint and you need to rub it down to sit flush and you dont want to rub down the area of paint around the scratch as you could go too low, once it's flush remove the tape and then machine polish it back up and it's as good as new and practically unnoticeable but you must make sure the scratch is clean otherwise you will trap the dirt/wax under the lacquer.
If your motor is a dark colour after bringing the flatted area back up to a shine I would go over it with this stuff:
http://www.farecla.co.uk/automotive/com ... g-compound
this wont leave holographic swirl marks which you commonly get on dark colour cars after mopping.
Re: My new X5 and progress so far with work (pic heavy)
Posted: Tue May 07, 2013 6:39 pm
by dpbayly
[quote="PeterL"]
It's not often I am impressed by other people and their work, but you definitely did a fantastic job. Would the compound you used on the headlights work on some scratches I have on the front side windows on my M5 as it has some scratches I would rather try to remove than replace the glass itself?
[/quote]
The compound isn't tough enough to have an effect on glass but i have in the past sucssesfully removed light scratches in my E39 540 front windows with Autosol metal polish and an air powered mini mop (machine polisher) but dont see why you couldn't use a full size polisher but i should think it will make a mad mess as you use a lot of the polish.
To show you it working I scratched this mirror lightly side to side and heavier at an angle
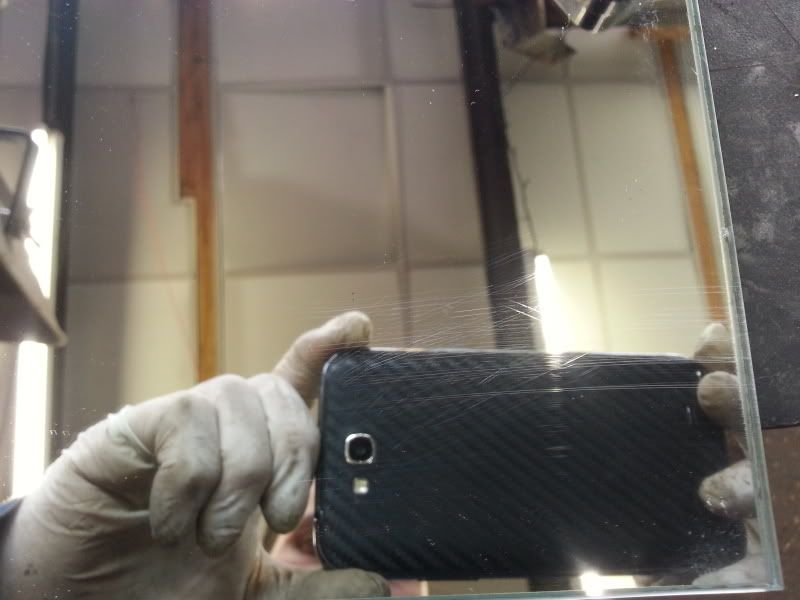
Then a quick hand polish with Autosol
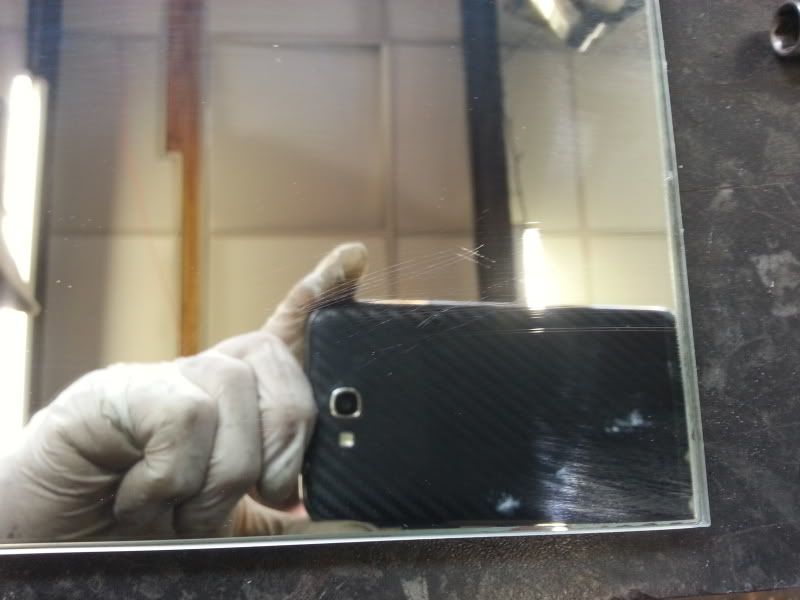
Then a longer harder rub with Autosol
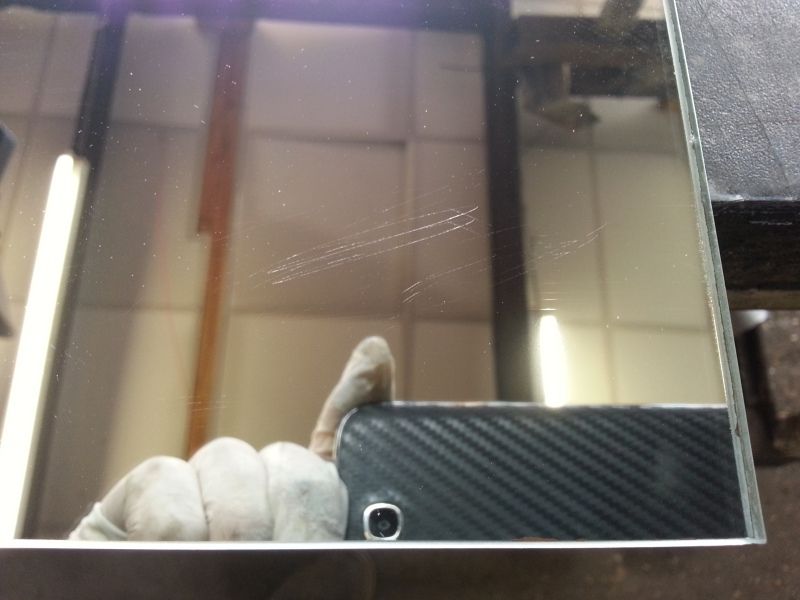
As you can see the light scratches are practically gone and if worked hard enough it will take the heavier ones out too but beware if the scratch if deep and you rub it right out it will distort the surface of the glass so that when you reflect off the glass you will see a low spot.
All the above pics were rubbed by hand (less mess)
Re: My new X5 and progress so far with work (pic heavy)
Posted: Tue May 07, 2013 7:24 pm
by storminmike
This is interesting because I reckon front windows get battered as much as the paint by all sorts of tiny gravel etc.... and in sunny weather can look awfull.
I've had a go at windows before with the metal polish but my arms gave out long before I'd done a reasonable amount. I like those little 90 degree sanders that wheel refub outfits use....air driven I thing but I don't think they're random orbital though. Shame those DIY detail sanders...the ones shaped like a triangle/iron couldn't be adapted with a suitabe pad...unless they can or is it too cowboy?
Something like this

Re: My new X5 and progress so far with work (pic heavy)
Posted: Tue May 07, 2013 9:14 pm
by T3RBO
Awesome work and excellent write up

Re: My new X5 and progress so far with work (pic heavy)
Posted: Tue May 07, 2013 9:17 pm
by dpbayly
[quote="T3RBO"]
Awesome work and excellent right up

[/quote]
Thanks
Re: My new X5 and progress so far with work (pic heavy)
Posted: Wed May 08, 2013 9:13 pm
by Petrolhead
[quote="PeterL"]
It's not often I am impressed by other people and their work, but you definitely did a fantastic job. Would the compound you used on the headlights work on some scratches I have on the front side windows on my M5 as it has some scratches I would rather try to remove than replace the glass itself?
[/quote]
You would need cerium oxide mixed with water into a paste and a glass polishing pad, you can do it with a drill mounted pad but it takes ages. Be careful not to build up too much heat in the 1 spot or it will warp the glass.
Re: My new X5 and progress so far with work (pic heavy)
Posted: Wed May 08, 2013 9:33 pm
by AW8
Storminmike - I wouldn't want to experiment on my car with a delta sander - however adapted


