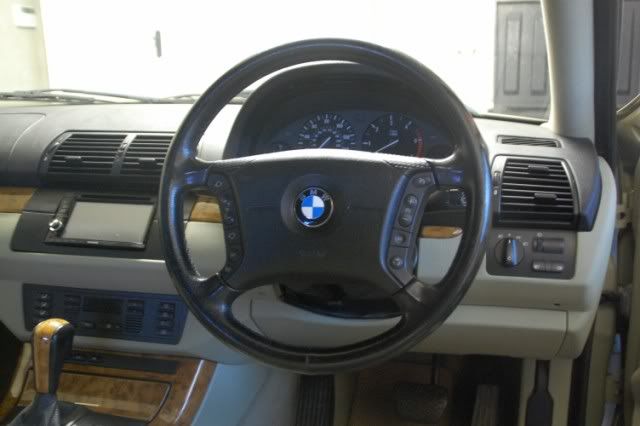
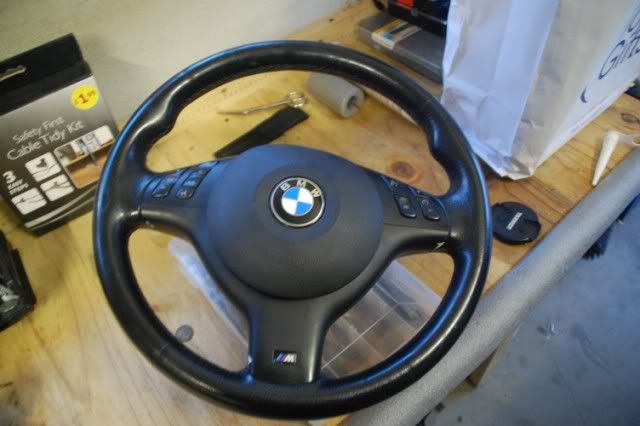
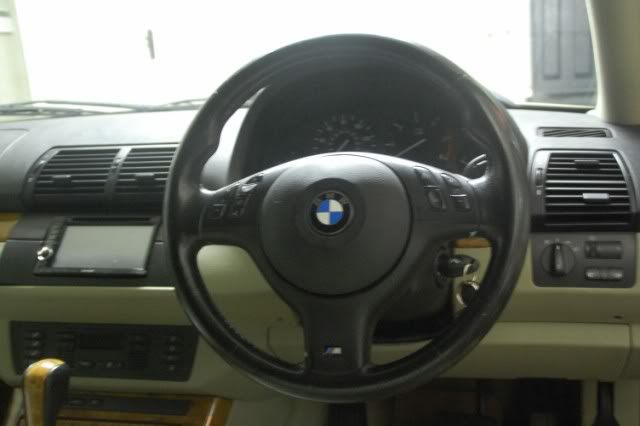
Spoke to several people including Lee at Quarry Motors who recommended the E46 M-Sport wheel, reckoned it was nice and said he had one in his on X5 sport. I have had a couple of E46 3 Series cars and really like the wheel so that was the decision made. A lot of phoning around and internet searching turned up a decent wheel, with airbag at a breakers about 40 miles form me - Ferris Breakers in Toombebridge, Northern Ireland. The wheel with airbag cost £180 - which was significantly less than I had quoted from several other sources. The wheel had a few little worn marks on the black plastic, common to these wheels but the leather and the remainder are in A1 condition.
I used a guide on Xoutpost - changing an X5 sport wheel to an M3 wheel - i have now modified this a bit to suit the SE wheel.
Tools needed:- Small flat head screwdriver, 10mm socket + extension bar, 16mm socket + extension bar, Torque wrench (recommended), T30 Torx bit + extension
The job took me about 1.5 hours.
As working on the airbag its important to isolate the power by disconnecting the battery - i was advised to leave the battery disconnected for 15 mins before starting to tamper. Prior to disconnecting the battery - make sure your steering wheel is centered and front wheels are as straight as possible. To disconnect the battery, remove the boot floor, take out the spare wheel, remove the 4 bolts holding the air compressor - carefully move the compressor to one side.
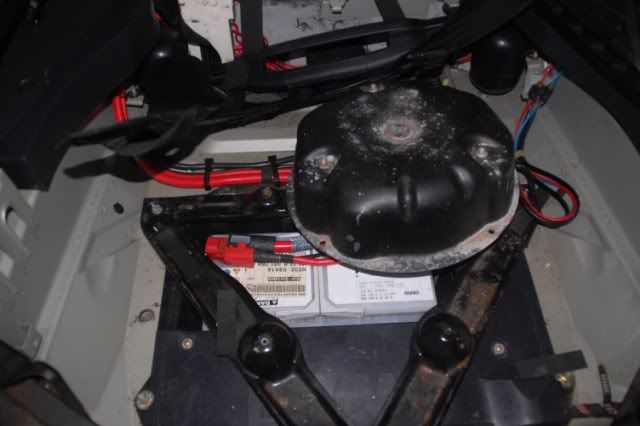
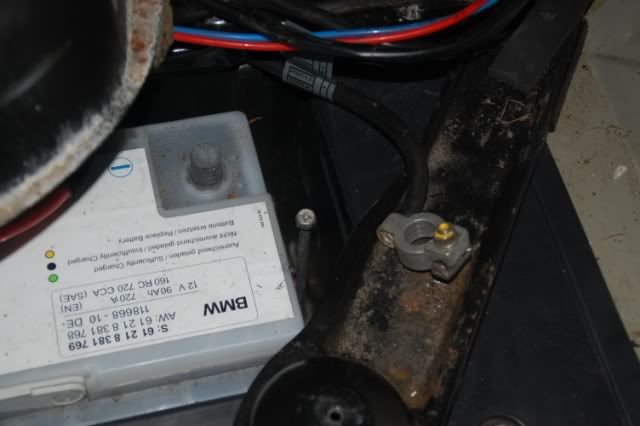
To disconnect the negative terminal - use a 10mm socket and loosen the nut at the top of the connector - slide the battery terminal off and move it well clear of the terminal.
I then went for a coffee - leaving for 15 mins!
Before starting to work on the wheel - check there is no power by trying to turn on something in the car - cabin light for example.
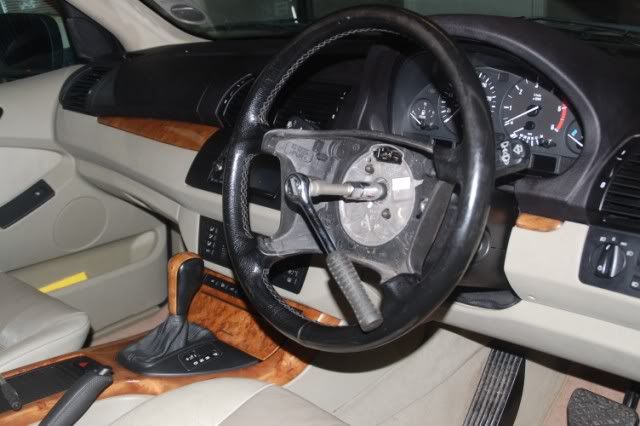
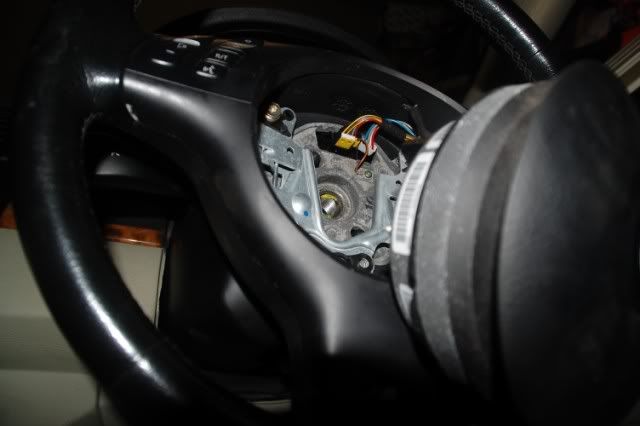
To remove the airbag module on the SE wheel, there are two holes on the back of the wheel - one on each side. Put the indicator and wiper stalks up to there maximum height to provide a little more space. A torx T30 bit is required to undo the bolts which hold the airbag module into the wheel. I found this bit really tricky and took me ages to get these two screws undone - there is not much space and found it hard to get the torx bit into position when you can not see what you are doing. The X5 sport wheel is different - it has two holes, but no torx screws instead a small flat head screw driver is slid into the hole from the 3 o'clock position and the 'clip' that holds the airbag in position is manipulated until comes free - see xoutpost article for full details
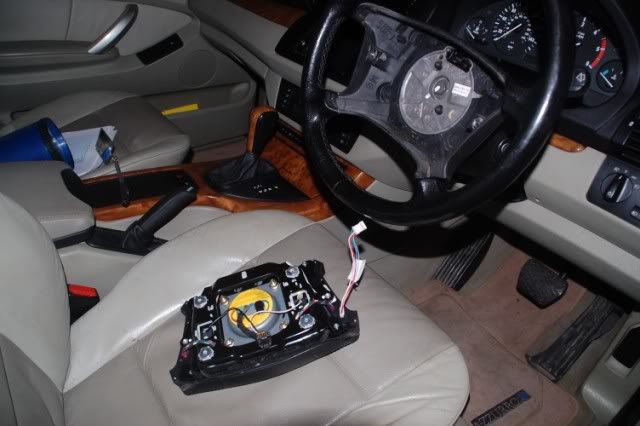
Once both torx screws have been undone the airbag module will slide forward
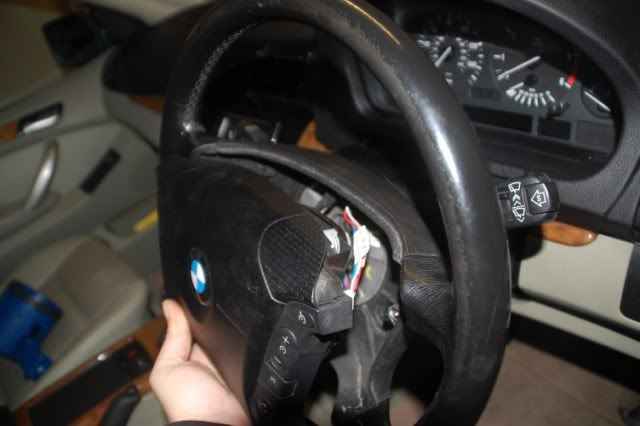
There are now two electrical plug connections to undo at the top center of the gap - one large black plug in the center and one small white plug to the right of the white plug. The larger black plug as a tab at the top, push this down and the plug pulls out. The small white plug just pulls out.
The module now comes away. If you are replacing a wheel but reusing your current airbag then the two connections on the back of the airbag module will need to be removed - once again see xoutpost article for details on removing these two clips
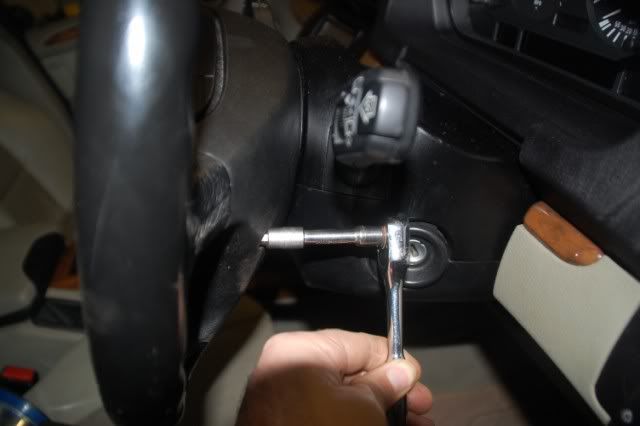
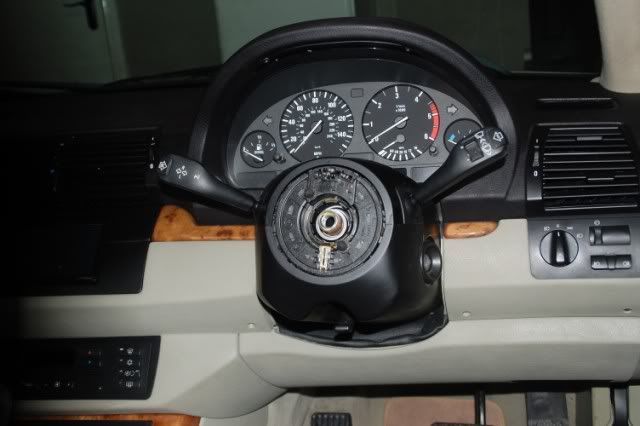
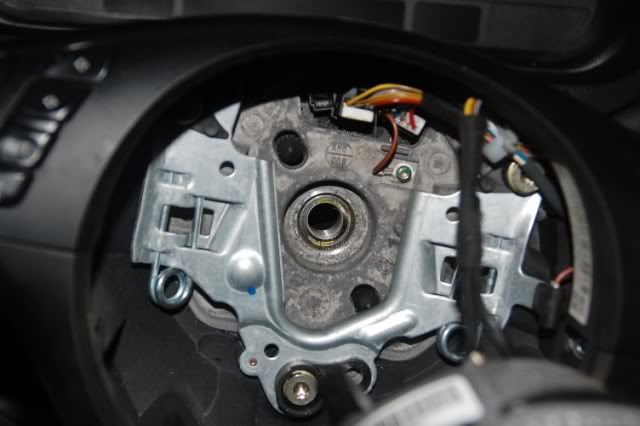
In the centre of the steering wheel is a 16mm bolt - A socket with an extension bar will be required to remove this bolt - it is VERY tight! Once the bolt is removed you can see the splines and there are two 'alignment marks' - small indentations/slits in the metal.
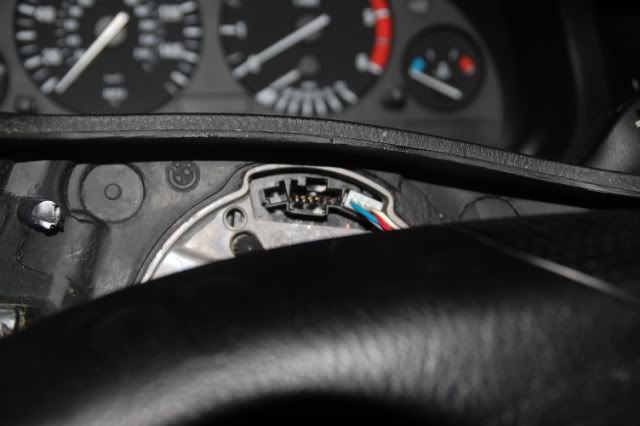
With the bolt removed, the steering wheel can now be pulled towards you - taking care not to whack yourself with it!
Its now time to fit the new wheel - with the airbag module detached at this stage.
Slide the new wheel onto the boss, aligning up the the two 'alignment marks' - then put the 16 mm bolt back in place and tighten up.
Alignment marks - hard to make out - about the 630 position if pretending a clock.
The torque required for this bolt is 80nm hence the torque wrench.
With the new wheel now in place, the two electrical connections are reattached, the large black plug at the upper centre followed by the smaller white plug to the right.
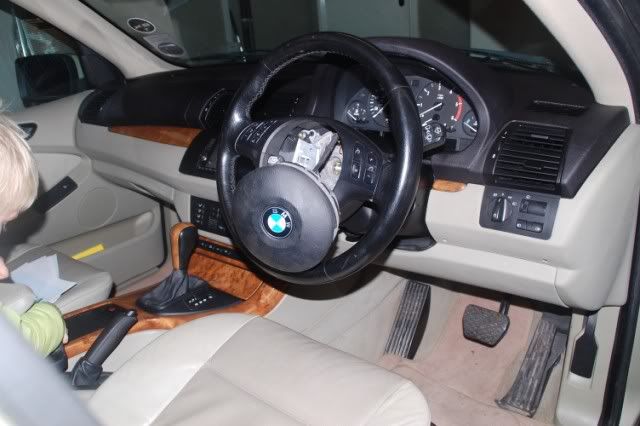
With the wheel now on, and the electrical connections made - its time to slide the airbag module back in (the airbag on my new wheel remained attached at all times - i at no time undid the electrical connection clips holding the airbag module - if these have been removed then of course they need reattached prior to sliding the airbag module back into place)
The airbag module is centered, and pushed in to place - you will 'hear' and 'feel' the two clips going into place and locking the module in place.
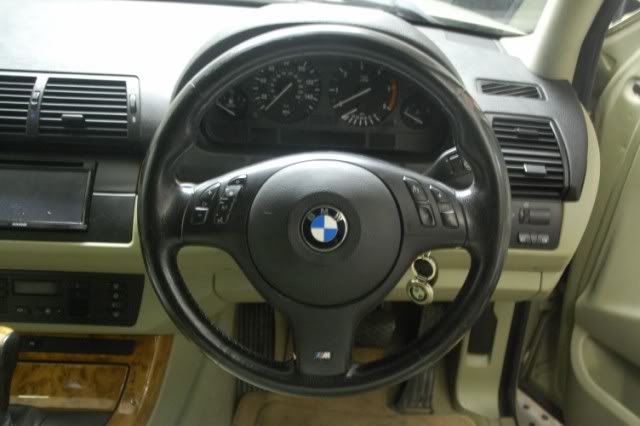
And there you have it - new wheel in position!
Then reconect the battery negative, tighten the 10mm bolt. Replace the aircompressor module and replace the 4 bolts. Put the spare tyre back and replace the boot floor and job done! As battery has been disconnected the clock, trip computer, radio settings all need resetting.
Job done and very very happy with the results - the new wheel has really added to the driving experience - a much nicer feel!