Not joined yet? Register for free and enjoy features such as alerts, private messaging and viewing latest posts and topics.
E53 OBC SCREEN RIBBON CABLE FIX FOR FADED SCREEN SYNDROME
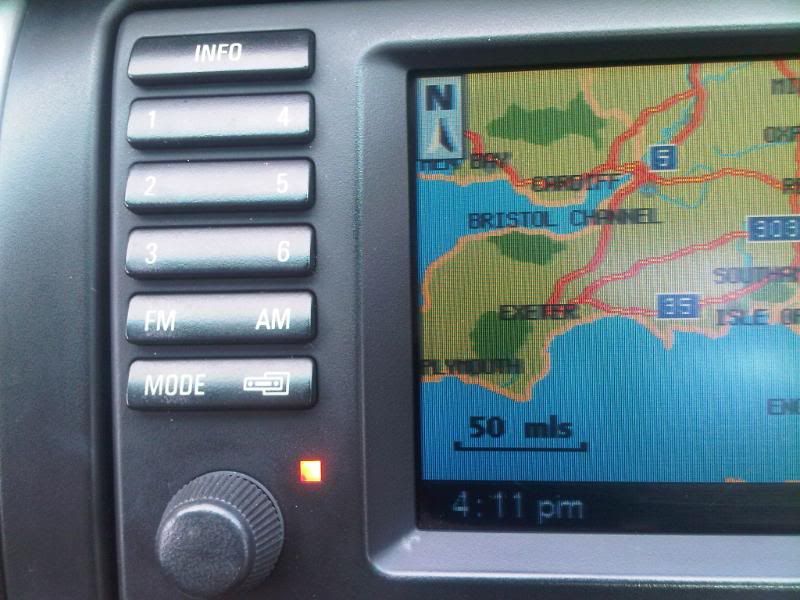
Following on from Penny’s (Itbarbie) thread you may know that some of us have been having/had obc screen issues with the screen going funny washed out faded colours.
I had tried cleaning the plugs going to the sat nav and tv module etc but my screen still went dodgy every now and then until about two weeks ago when it was constantly faded and even more annoying .
Following Sanj’s advice I finally today had time to take a look at the screen itself and check the ribbon cable and plugs to the rear of the screen. I took out the monitor and undone all the connections and re fixed them and hallelujah the screen is now back to normal (for now at least)fingers crossed it is now sorted I will keep an eye on it and report back should it go faulty again.
Here’s how I did it for the benefit of others…..
Firstly prize the monitor trim off wit a flat bladed screwdriver (or trim removal tool)
Here is the trim off
Which exposes the four size 10 torx screws (red arrows)that hold the monitor in no need to undo the yellow circled screws as they are part of the front.
Once undone the monitor will pull out
Undo the blue and white plugs by pressing the tab and pulling the arm back to release the plugs(there was another ibus type cable that wasn't plugged in which i presume was for cars with DSP so DSP cars would have to unplug that aswell if thats the case)
Which leaves you with a fair sized hole in the dash
Next undo the four small philips screws that hold the top cover on (shown with red arrows)
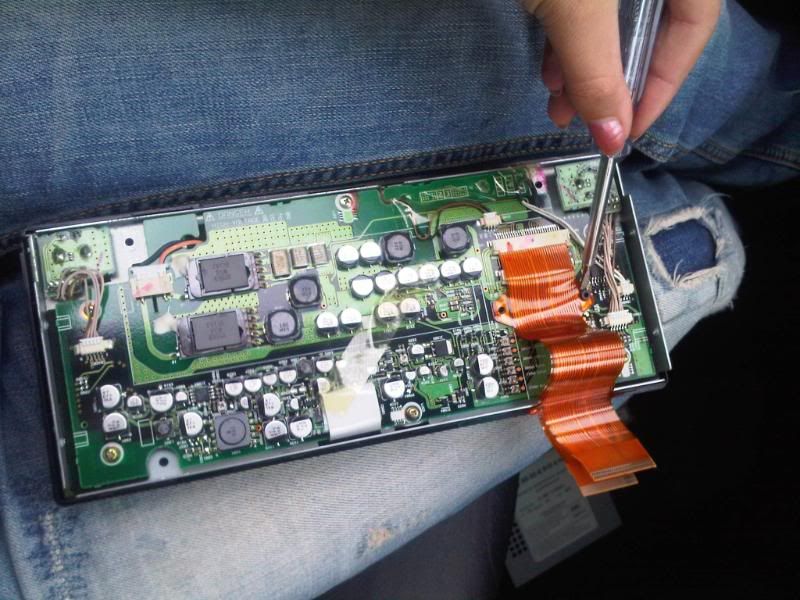
This will expose the ribbon cables that need to be undone and re plugged in (I think in my case the cable had come loose)
Put everything back in reverse order and hey presto a nice bright picture….. All I need to do now is clean the screen from my muccy paws lol
While I was doing this I popped out the middle section (air con ,fan etc) just to see how it fitted as someone was asking about changing there’s the other day IIRC
It just held in on a spring clip so would prize out easy with care.
HTH
I had tried cleaning the plugs going to the sat nav and tv module etc but my screen still went dodgy every now and then until about two weeks ago when it was constantly faded and even more annoying .
Following Sanj’s advice I finally today had time to take a look at the screen itself and check the ribbon cable and plugs to the rear of the screen. I took out the monitor and undone all the connections and re fixed them and hallelujah the screen is now back to normal (for now at least)fingers crossed it is now sorted I will keep an eye on it and report back should it go faulty again.
Here’s how I did it for the benefit of others…..
Firstly prize the monitor trim off wit a flat bladed screwdriver (or trim removal tool)
Here is the trim off
Which exposes the four size 10 torx screws (red arrows)that hold the monitor in no need to undo the yellow circled screws as they are part of the front.
Once undone the monitor will pull out
Undo the blue and white plugs by pressing the tab and pulling the arm back to release the plugs(there was another ibus type cable that wasn't plugged in which i presume was for cars with DSP so DSP cars would have to unplug that aswell if thats the case)
Which leaves you with a fair sized hole in the dash
Next undo the four small philips screws that hold the top cover on (shown with red arrows)
This will expose the ribbon cables that need to be undone and re plugged in (I think in my case the cable had come loose)
Put everything back in reverse order and hey presto a nice bright picture….. All I need to do now is clean the screen from my muccy paws lol
While I was doing this I popped out the middle section (air con ,fan etc) just to see how it fitted as someone was asking about changing there’s the other day IIRC
It just held in on a spring clip so would prize out easy with care.
HTH
54 PLATE E53 3.0d X5 FACELIFT BLACK WITH BLACK
E53 OBC SCREEN RIBBON CABLE FIX FOR FADED SCREEN SYNDROME
Wayhay glad you got it sorted and good write up. I take it you were relegated to fixing it in the car! Us girls don't like mess in the house. Is there any part of the X that you haven't taken apart yet? Lol
At least Kena won't have an excuse to fix his now
Sent from my iPhone using Tapatalk
At least Kena won't have an excuse to fix his now
Sent from my iPhone using Tapatalk
2004 Sapphire Black 3.0d SE
MODS
Intravee with KCA, Xennons, Folding Mirrors (enabled with Intravee), Sport Wheels 19's, DVD Headrests, updated SAT NAV, Voice Recognititon with TV in Motion enabled with Resler a
MODS
Intravee with KCA, Xennons, Folding Mirrors (enabled with Intravee), Sport Wheels 19's, DVD Headrests, updated SAT NAV, Voice Recognititon with TV in Motion enabled with Resler a
Re: E53 OBC SCREEN RIBBON CABLE FIX FOR FADED SCREEN SYNDROM
Looks like you need some tuition on using a saw looking at the battle scars and that left mitt pal LOL
Re: E53 OBC SCREEN RIBBON CABLE FIX FOR FADED SCREEN SYNDROM
At least his healed well! Mine is still battle scarred!
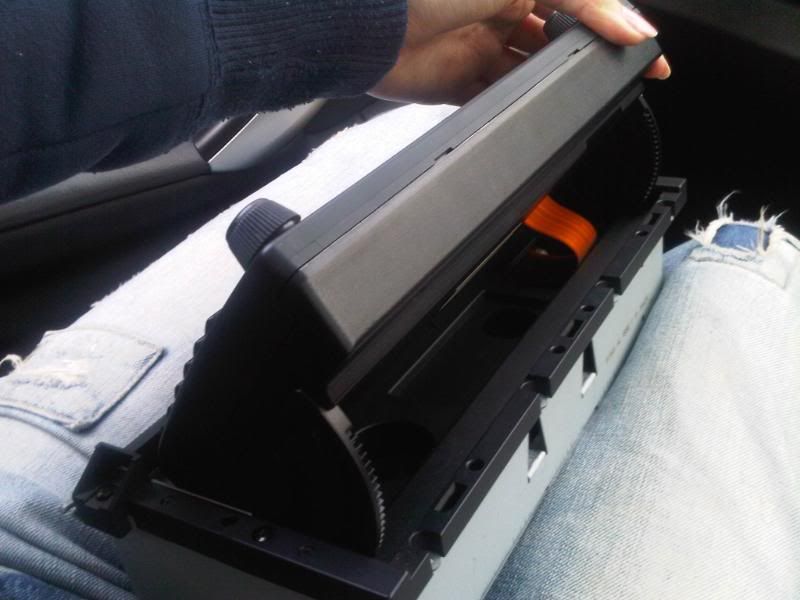
Just to add, if you put the headunit in eject mode and stick a tape half-way in to fool the head unit it will stay open. Then you can unclip the surround, top left/right and two along the bottom edge (x555's second pic).
Brilliant write-up (can I claim a royalty on this fix - I could be a millionaire)!
Drinks on you and Penny at the meet!
Last edited by Sanj on Sun Jun 19, 2011 9:09 pm, edited 1 time in total.
Scn Protect,Alarm Chirp,Ashtray del,Sub install,IV2,Screens,PS2 Media,Chrome rings,Schnitzer pedals,Reverse cam,Silver Grills,F/mirrors,Comp Spkrs,Heated S/W,20"168s,Splash scn,Arches,Remap,LED Tails,ACS Spoiler,'is' Bumper Trim,Rear heated seats,Rear blinds
Re: E53 OBC SCREEN RIBBON CABLE FIX FOR FADED SCREEN SYNDROM
Nice Cassette Deck
Why they fitted a cassette deck I will never understand. Our E46, which is the same production year, came with a mini disc head unit. I had long since retired cassettes from the hi-fi by 2005!
Good write up by the way
Why they fitted a cassette deck I will never understand. Our E46, which is the same production year, came with a mini disc head unit. I had long since retired cassettes from the hi-fi by 2005!
Good write up by the way
Last edited by X5Sport on Sun Jun 19, 2011 9:10 pm, edited 1 time in total.
Never anthropomorphise computers. They hate that.
Re: E53 OBC SCREEN RIBBON CABLE FIX FOR FADED SCREEN SYNDROM
[quote=""ITBarbie""]Wayhay glad you got it sorted and good write up. I take it you were relegated to fixing it in the car! Us girls don't like mess in the house. Is there any part of the X that you haven't taken apart yet? Lol
At least Kena won't have an excuse to fix his now [/quote]
E53 OBC SCREEN RIBBON CABLE FIX FOR FADED SCREEN SYNDROME
[quote=""kena""][quote=""ITBarbie""]
At least Kena won't have an excuse to fix his now [/quote]
[/quote]
And it's all gone quiet down the front! And it's all gone quiet down the front!
Sent from my iPhone using Tapatalk
At least Kena won't have an excuse to fix his now [/quote]
[/quote]
And it's all gone quiet down the front! And it's all gone quiet down the front!
Sent from my iPhone using Tapatalk
2004 Sapphire Black 3.0d SE
MODS
Intravee with KCA, Xennons, Folding Mirrors (enabled with Intravee), Sport Wheels 19's, DVD Headrests, updated SAT NAV, Voice Recognititon with TV in Motion enabled with Resler a
MODS
Intravee with KCA, Xennons, Folding Mirrors (enabled with Intravee), Sport Wheels 19's, DVD Headrests, updated SAT NAV, Voice Recognititon with TV in Motion enabled with Resler a
Re: E53 OBC SCREEN RIBBON CABLE FIX FOR FADED SCREEN SYNDROM
LOL was nice to have a clean easy job to do on the x for a change instead of grease and oil.
@ Penny .... Thanks hun and regards to any part that i haven't taken off yet .....good questiion though i'm sure something will keep me busy before long.Most of what i have done is general maintenance and wear and tear so i'm not too bothered and i can always come on here for a rant and moan about it anyway
@ Mark ..... one of them was from building your little ones play house it is quite obvious that i'm right handed
@ Sanj ....chicks dig scars mate
@ X5sport ....it does seem daft with the cassette deck......when i flipped the screen to impress the kids the other day (as if by magic ) they both looked and said what the hell is that dad
@ Kena... come on fella no excuse now with the write up
54 PLATE E53 3.0d X5 FACELIFT BLACK WITH BLACK
Re: E53 OBC SCREEN RIBBON CABLE FIX FOR FADED SCREEN SYNDROM
Thanks for write up........have had the green screen issue myself on & off so today, (currently having some spare time), I tackled this........or should I say my eldest teenage daughter did.
I had this d.i.y. open & apart from me releasing the trim & 1st four fastenings she did the whole lot herself, (sometimes but by far from always), under my watchful eye.
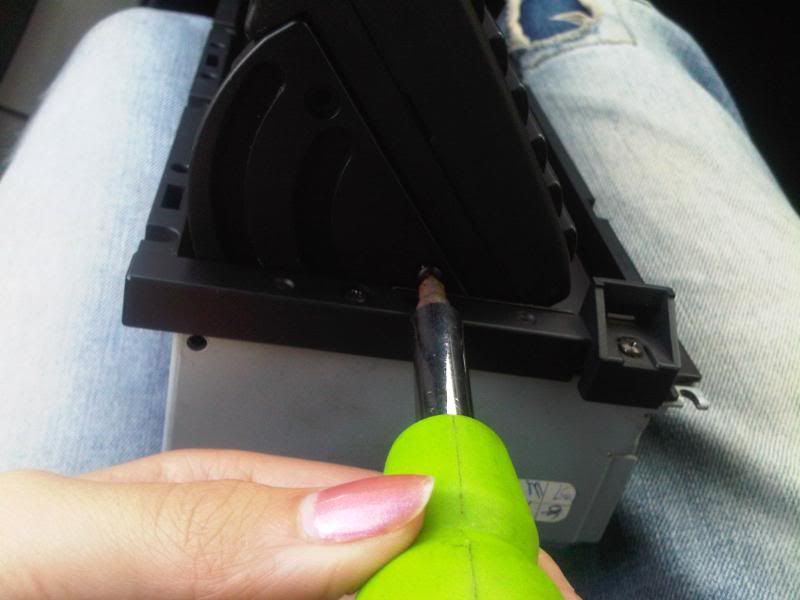
Once she had completed the d.i.y. shown here, (& with screen open with cassette partially ejected & ribbons still unconnected from the main unit), she also wiped & reseated other ends of the ribbons. DIY is as follows :
(a) Separate the screen from the opening side arms, (4 screws).
(b) Undo 4 further screws which hold the screen together.
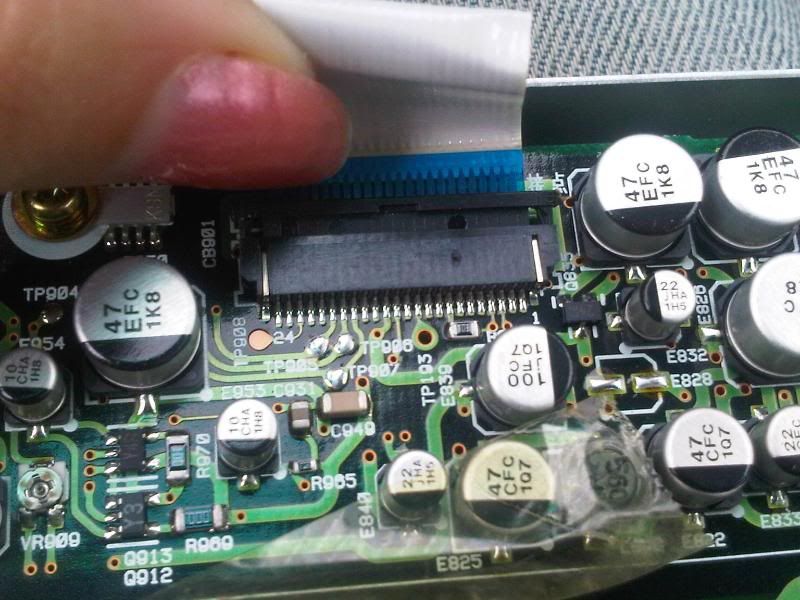
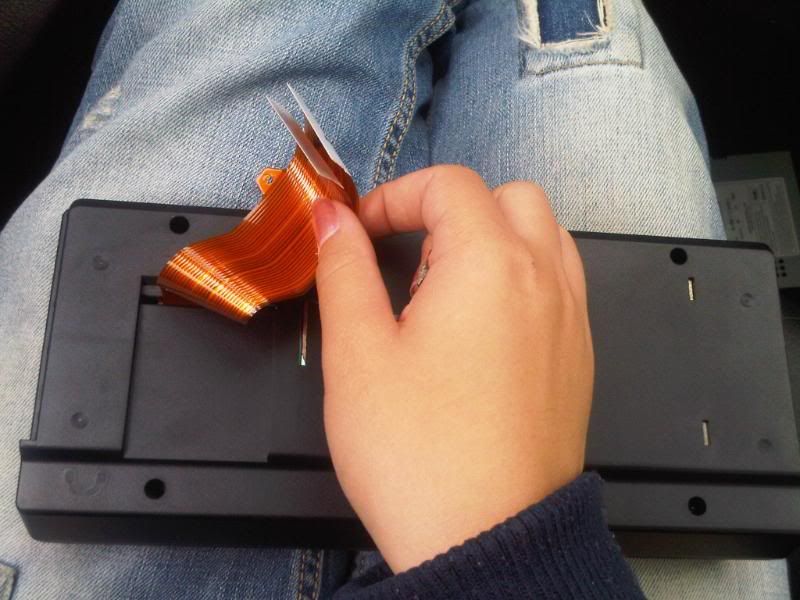
(c) Separate screen into two pieces then unplug the other end of the ribbons that go into the PCB, on back of screen using small flat screwdriver to pry apart. No pic of this, sorry, however, self explanatory when it's in your hand(s).
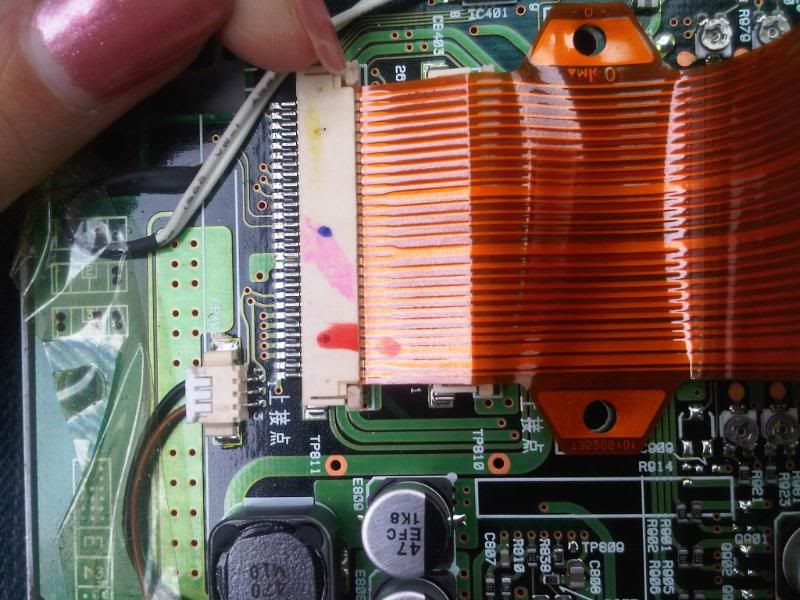
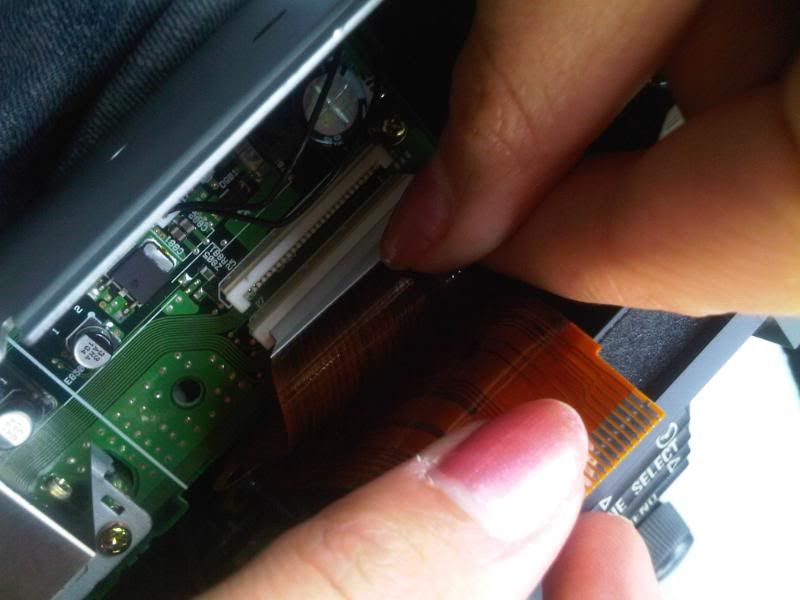
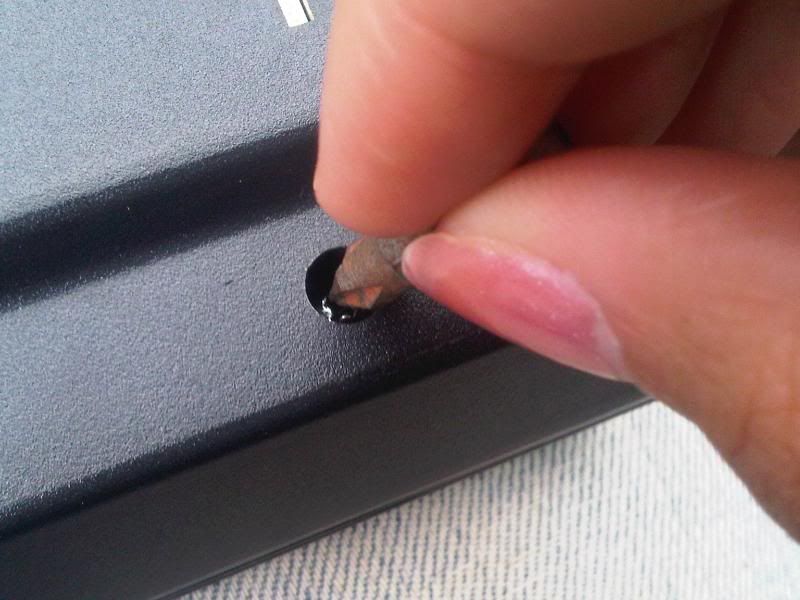
(d) Using small flat screwdriver, carefully prise small black tabs & retainers either side of ribbons.
(e) Gently lift the 2 small tabs to release the top ribbon cable
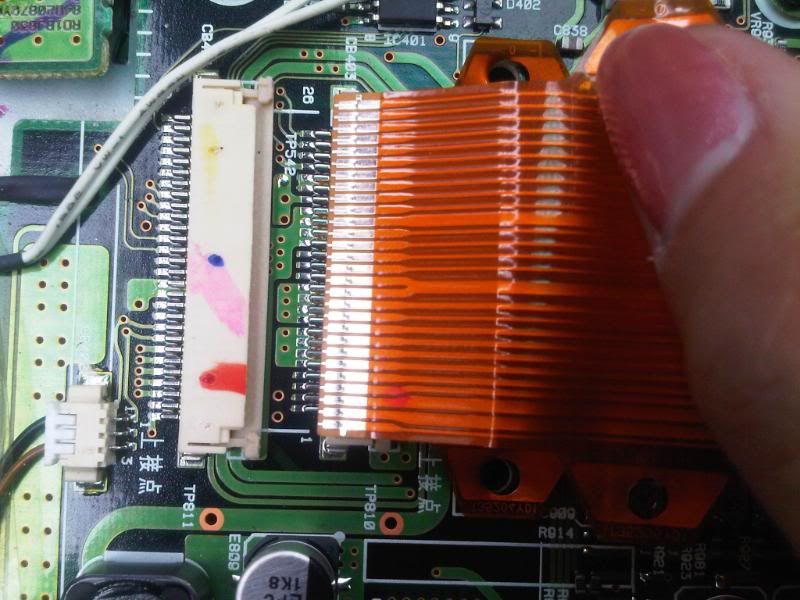
.....then release & gently lift top ribbon away & repeat procedure for 2nd ribbon underneath.
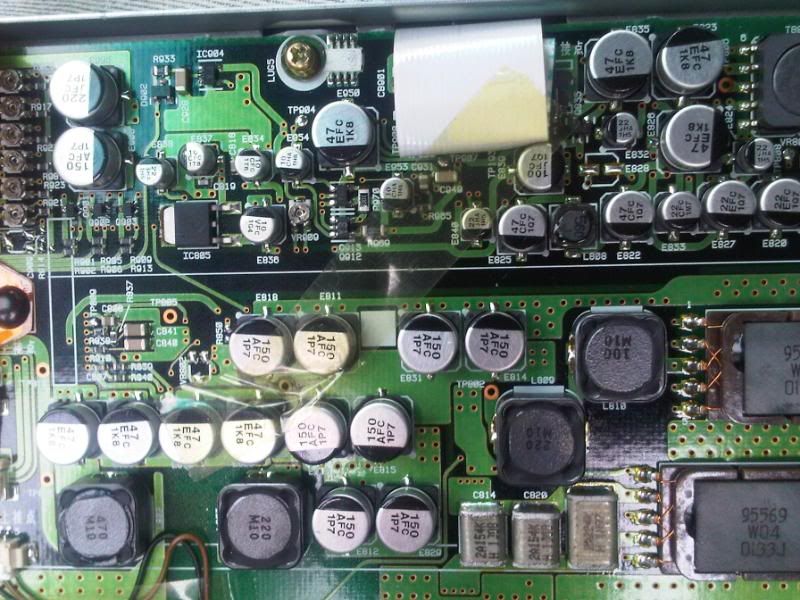
At top of unit there is another small ribbon, haven't a cue what it does.....but obviously another connection of sorts. (No idea what the adhesive tape is doing there but thought it best to leave it be, other than lifting it to access the connector)
My daughter gently removed, wiped ( with dry MF cloth) & reseated this too
Care needed to thread ribbons back the right way
& reconnect
Then reassemble screen, attach back to the unit & refit (opposite of pic instructions by x555).
Be careful to pay attention to ensuring ribbons reconnected & routed properly...... No problems encountered but potential for problems if careless.
Result......nice clear screen display with waters features now shown as a vibrant, (& constant), blue.
I know it's boring 2D/Mk3 Nav but it's vibrant in colour now. Cars keep my wallet busy enough without upgrades & mod's....Maybe will treat self to Mk4 one day.
I was very grateful of my daughters' time, patience, attention to detail & her not having clumsy sausage fingers like mine
Will now see how this lasts but presently very happy with results.
Thanks again to all contributors here
........& of course big special thanks to my Wonderful Daughter,(who even took all the photo's on her blackberry),
P.S. Since doing this today she has repainted her nails
Gone - 2002 E53 X5 4.4i Sport (Pre Facelift) Owned 2006-2016.
Site & Forum Admin Team Member.
Re: E53 OBC SCREEN RIBBON CABLE FIX FOR FADED SCREEN SYNDROM
Cracking guide. Was in the process of giving up on my on board sat nav as rubbish as you couldn't tell the route from the road due to it all bring the same shade of grey. Quick clean of the ribbon cable and blimey! It's actually a colour screen.
'04 3.0D Sport
Re: E53 OBC SCREEN RIBBON CABLE FIX FOR FADED SCREEN SYNDROM
[quote=""LFP""]Cracking guide. Was in the process of giving up on my on board sat nav as rubbish as you couldn't tell the route from the road due to it all bring the same shade of grey. Quick clean of the ribbon cable and blimey! It's actually a colour screen.[/quote]
thanks for bringing out this thread, didn't realise it could be the ribbon - i often wondered that the screen is kind of dull!! must do this sometime!
Current: BMW 640i Convertible (320PS)
Audi A7 Sportback 3.0 T FSI quattro (300 PS) SE STronic
Previous: BMW X5 E53 Facelift 3.0d
Audi A7 Sportback 3.0 T FSI quattro (300 PS) SE STronic
Previous: BMW X5 E53 Facelift 3.0d
-
- Newbie
- Posts: 1
- Joined: Sat May 19, 2012 5:13 am
Re: E53 OBC SCREEN RIBBON CABLE FIX FOR FADED SCREEN SYNDROM
Love the post and want to try and fix my screen that turns on but stay black. Problem is your instructions are for a newer screen. Anyone know how to remove the 4:3 screen unit that has no trim....
Re: E53 OBC SCREEN RIBBON CABLE FIX FOR FADED SCREEN SYNDROME
Amazing write up and pics by X555. as always top quality. I was going to do this now, 21.30 but only realised i dont have a torque 10 head to remove screws after prising off casing around satnav. Will do it tomorrow.
55 E53 3.0d with Pano roof and full coms pack. Black with Black
Re: E53 OBC SCREEN RIBBON CABLE FIX FOR FADED SCREEN SYNDROME
Clearly a :bump: but wanted to say thanks, I've done the first part of this today and appears to have helped. I'll complete the full tear down if needed later. Thanks for the how to, it's great when folks take the time to put the pics up for others etc.
2005 (55 plate) x5 3.0d sport, auto trans, nav tv thingy, but no dsp.
Under a turbo swap presently (fingers crossed it fixes her!)
-
- Snr Member
- Posts: 1339
- Joined: Sun May 25, 2014 11:13 pm
Re: E53 OBC SCREEN RIBBON CABLE FIX FOR FADED SCREEN SYNDROME
Question..
Re the ribbon cable etc....
is there any likelihood that the ribbon re-fitting may clear dead grey sectors in this display ?
Re the ribbon cable etc....
is there any likelihood that the ribbon re-fitting may clear dead grey sectors in this display ?